
|
|
|
| Operating Systems Development Series | |
|
This series is intended to demonstrate and teach operating system development from the ground up. IntroductionWoohoo!! Its finally time to start developing our kernel and hardware abstraction layer (HAL). In the previous tutorial, we have taken a look at putting basic kernel concepts together, and looking at the different basic kernel design layouts. We have also decided that we will be developing a hybrid kernel design for our operating system, as it uses some concepts derived from Microkernels and Monolithic kernel designs. This will allow us to look at some concepts from both worlds. In this tutorial, we will start building our Kernel program, and start developing our Hardware Abstraction Layer library. At the moment, we have our system set up so tht we can develop the kernel and Hardware Abstraction Layer within a higher level programming language - C or C++, depending on the compilier being used. To keep compatability with C compiliers, we will be using C instead of C++. However, I might be developing C++ versions of the source as I personally prefer C++ over C :) So, heres what is on the list for this week:
Before we Begin...This is our first step away from the bootloader world. Within our bootloader, we did not need to worry much about portability nor system dependency. After all, the bootloader - by its very nature - is very system dependent. However, now we have made the jump from the bootloader to the Kernel, being developed in C or C++. This is also the beginning of our own runtime library, and Hardware Abstraction Layer (HAL)--Alot of things going on, huh? However, it does not get easier. Operating Systems can get very large in size. Because we do not know how large this system will be, we need to stress good coding practices from the start. Many development projects fail. It is not because it is to complex, however. Any project can be made with less complexity if designed right. This is what I want to look at next...Pandora's BoxesThe truth is, simply put, code is evil. Code can get very disorderly and ugly. It is this that adds on more complexity do to the chaotic and recursive nature of code and design. Dont get me wrong, we will still need to rewrite alot of code. The reason for this is because there is no right design. This is what makes code chaotic: After the initil write and rewrites the code itself can be very malformed. This has the tendensy to stop an entire project, specifically large projects, as the rest of the system needs to rely on the chaotic nature of this ugly written, and poorly designed code. Its like a plauge...Where it starts in one area of the system and spreads to the rest of the software. How do we stop this from happening? "People say Pandora's Box was evil, but they're wrong. The stuff inside it was evil. The box ain't nothin' but a box." - Anonymous As long as the code is contained within a nice little box, it does not matter how disordley or ugly the code gets on the inside. As long as this code is tucked away within a nice little box where no one can see it. On the inside of the box can contain deamons, creatures, and other things -- we dont care as that cannot get out of the box. After all, all we see is the box. We dont need to care how it works, it simply works. This, my friends, is the bases of isolation and containement. That is, Encapsulation, and the bases for nearly all of software engineering. We first write what the inside of the box does. After this, when this module is completed, we close the box and connect it to the rest of the system. But, you never, ever open the box after its been closed. Doing so lets out all of the evils within the box, as it breaks encapsulation. Once you open a box, it will infect as many peices of code as it can though compile, linker, or runtime errors, and leave the whole project into a big mess. A solid, well designed system will treat all of its components as isloated ("encapsulated") boxes connected together and nested within other larger boxes. Encapsulation is a very important concept in software engineering. Even if you are not an Object Orianted Programmer, the concept of encapsulation is still there.Interface and ImplimentationUsing the Pondora's Box anology again, we can say that the "interface" is the box, and the "implimentation" is what is within the box. The interface ("public") part of the box is the connection from that box to the outside world. It is what connects our box to other boxes within this subsystem. The interface itself containes all of the function prototypes, structures, classes, and other definitions that the box exposes to the outside world so the outside world can use and interact with the box. This is the Interface. All of the evil code that dwells within this box that define the module, all of its functions, class routines, etc. is the modules implimentation. It is important to construct each box ("component") with an interface that is simple and to the point. It should also be clear at what each componenet does. In C, the global namespace can get very cluttered with tons of routines. Because of this, it is important to name these routines and interfaces to help clearly identify them. You will also need to insure that the implimentation detailes of the box (The "private" part) are kept as private members. Putting any part of this in the interface is bad, as it can open up the box (Which is bad.) In C, we can insure routines stay as part of the implimentation by using the static keyword. Interfaces can be made by using the extern keyword. Within C++, It is encouraged to use classes, with the private, public, and protected keywords.Get ReadyWe will be using the above concepts with developing our system to promote good programming practices with large scale software. Because portability between compiliers is a concern, we will be developing the system using the C programming language. Please keep in mind, however, that you may use C++ if you prefer. Our primary focus is that of expandability and portability. Because of this, we will be hiding all hardware dependent implimentations behind its own little box - The Hardware Abstraction Layer (HAL). Because the C++ startup runtime code it compilier dependent, we will put that in its own little box - The CRT (C++ Runtime) Library. All of this will be completely independent of the rest of the system. Remember: The key is isolation. It does not matter how they are isolated, so long as the interfaces are clean and nice. The more isolation you have, the better, and remember to never open a box once it has been closed. With all of this in mind, lets take the first step into our system...Code Layout and DesignThis tutorial containes our most complex demo so far. Because of this, I would like our readers to open up the demo source, and follow along with the tutorial for better understanding of everything.Code DesignIt is very important to understand why we have chosen this structure for this series. The primary reason is that of encapsulation, where each directory containes a separate library module. That is, Each of these modules is a pondora's box. It is extremily important to keep these modules as separate as possible in order to maintain code stability, structure, and portability. In order to do this, I have decided to treat each module as independent library modules.The only thing that does not need to be built as a library module are the files within the Include/ Directory. As they are only header files, they should never have the need to contain implimentations. Because of this, there is no box to open. As with applications, I have decided to make the C++ runtime code the first code to be executed. In other words, the bootloader does NOT execute the kernel. Instead, it executes the runtime code (CRTLIB), which sets up the envirement for the kernel, and then executes the kernel. _null.hYey!! Its time to start getting down to the nitty griddy of the tutorial!About C++ includes...If you are using C++, you might be interested about the library header files. That is, in C++, the appended *.h is dropped, and a c is prepended to all C headers. So, instead of #include <stdlib.h>, C++ uses #include <cstdlib> We would like to encourage creating an interface compatable with both languages. However, you might be wondering how do we do that? Its very simple, actually. In all compiliers standard include/ directory, you will see different variants of the same file. i.e., you will see stdlib.h and cstdlib. cstdlib is simply a header file that #includes stdlib.h and no more. We will be doing the same with our library. This will allow the developers using C to use stdlib.h, while our C++ developers can still use cstdlib. This way we can both encourage good habits.Back on topicThe first abstraction I would like to look at is NULL. There really is not that much to say here. However, there is one small detail: The way NULL is defined depends on whether you are using C or C++. Within standard C, NULL is defined as (void*)0. Within C++, it is simply 0. We can determin this by using the fairly standard __cplusplus predefined constant:There is more in this header do to the template, but this is the important part. Everything else is quite easy. size_t.hAbout Data Hiding...Remember the Pandora's Box theory. The data types within a box are on implimentation detail. Some data types are okay, however some or better kept within the implimentation. size_t is one of them. By keeping the implimentation details, we can modify anything we like about the data type, without effecting anything that uses that type, so long as we remain backward compatable.Back on topicThere isnt much to say about this one...
Data Type Hiding - stdint.h and cstdintWithin the previous section, we were encouraging the importance of data hiding within an interface, However, we did not stress the importance of it with relation to portability. Each data type has a specified size to them. However, the size of each data type completely depends on the compilier and system this is being built for. Because of this, it is important to hide the data types behind a standard interface, specifically because we are working in an envirement where Size Does Matter(tm).stdint.hThis is a fairly big file at about 150 lines. None of it is very hard, however. It defines different integral data types that are guaranteed to be a certain size. Lets look at the fundemetal types, as we will be using them throughout the system:When compiling for a 32bit system, the above data types are guaranteed to be the same. That is, uint8_t is guaranteed to be 8 bits. uint16_t is guaranteed to be the size of a WORD (2 bytes), and so on. The size of the data type is encoded in its name, so we will always know its size. There is alot more code in this file, but most of it is fairly easy. The file cstdint simply #includes stdint.h. This allows us to include these declarations in two ways: Please see About C++ includes... section for more information of why we have done this. ctype.h and cctypectype.h is a set of macros that help determin what type of character in a string is. It does this by following the different properties of the standard ASCII Character Set. You can get it from asciitable.com This header file includes several macros and constants:Pretty simple stuff so far. The above macros may be used to determin and modify individual characters. For C++, There is also cctype that may be used instead of ctype.h. va_list.h and stdargThese are standard headers containing macros for accessing unnamed parameters whithen a variable argument list.va_list.hva_list.h abstracts the data type used for varable leangth parameter lists.
stdarg.h and cstdargThis is our final basic library include file that we will look at. It defines some nice macros that we may use for C and C++ varable length parameter lists. These macros are fairly tricky, so lets look at them one at a time.VA_SIZEThis is a little tricky. VA_SIZE returns the size of the parameters pushed on the stack. Remember that C and C++ uses the stack to pass parameters to routines. On 32bit machines, each stack item is normally 32 bits. va_startThe standard va_start macro takes two parameters. AP is a pointer to the parameter list (of type va_list), and LASTARG, which is the last parameter in the parameter list (The parameter right before the ...). All this routine does is get the address of the last parameter, and adds the size of the parameter size to that address. If the stack size is 32, then all it does it add 32 to the last parameters address on the stack, which is where the first parameter in the parameter list is at. va_endThre isnt much to do here. va_argThis is a little tricky. va_arg() returns the next parameter in the parameter list. AP should contain the pointer to the parameter list that we are working with. TYPE containes the data type (int, char, etc.) All we need to do is add the number of bytes of the data type (TYPE) to the varable parameter list pointer (AP). This insures the varable parameter list pointer now points to the next parameter in the list. After this, we derefrence that data that we have just passed (by incrementing the pointers location) and return that data. DemoJeeze, there is alot of stuff in this tutorial. The demo is even more funner, as it developes its own printf() routine that we can use for debugging and displaying text.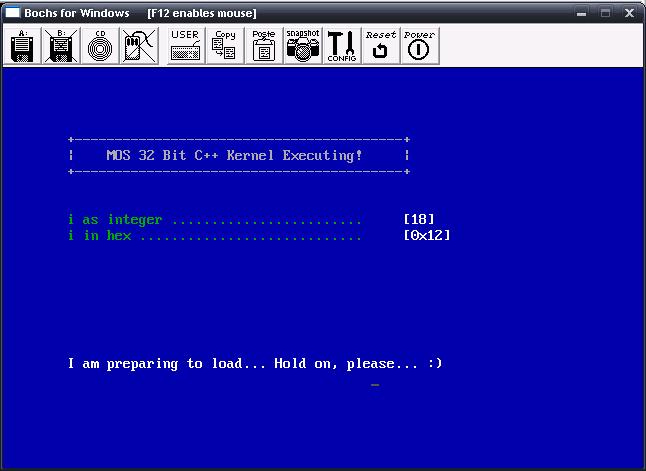 ConclusionWow--Alot of things in this tutorial! We covered a bit of stuff - some may be new concepts to some of our readers. This tutorial I personally did not want to write. I wanted to find a nice and good way of covering some basic ground, theory, and design concepts before diving into the code. We have also looked at a few basic standard library headers as well, and looked at the basic structure of our system. Now that the basic neccessities are taken care of, in the next tutorial we will start building the actual Kernel and Hardware Abstraction Layer (HAL). We will cover error and exception handling theory and concepts, interrupt handling, the Interrupt Descriptor Table (IDT), and how to trap processor exceptions so it will no longer triple fault. We can also build our own super 1337 BSoD too ;)Until next time,
~Mike |

